by Drago Z Kamenov
| Apr 12, 2012
 In a previous article, we looked at monitoring HBase – a NoSQL distributed database running on top of Hadoop. But how does one deploy an HBase cluster in the first place? Installing Hadoop and HBase on numerous cluster nodes, making sure they communicate properly, starting up the cluster – and making sure everything works flawlessly – can be a daunting task. A great way to simplify the process is to use whirr – an Apache open-source tool dedicated to standardizing cluster deployment across cloud computing platforms. Whirr is “provider-neutral” – meaning that you can use the same easy process to spin up a Hadoop or HBase cluster whether your provider is Amazon EC2 or Rackspace (more providers are in the works). The rest of the article is a step-by-step guide on how to do just that.
Step 1. Install Whirr Whirr is available as a .rpm or .deb package for all major Linux distributions from the BigTop repo, but that may not be the latest version (0.7.1 as of this writing). Because whirr is still being actively developed – with new features and bug fixes in each release – I am going to break my usual rule and advise you to install the latest stable release from tarball if it is not available on BigTop. Throughout the rest of the article I will assume that you have installed whirr in $WHIRR_HOME (you do not need to set it as an environment variable).
Step 2. Create the Configuration File We will use a sample .properties file provided with whirr as a template. Create a directory where we will store all relevant files and copy the sample configuration file there:
$mkdir ~/hbase-cluster

$cp $WHIRR_HOME/recipes/hbase-ec2.properties ~/hbase-cluster
Now let’s modify the configuration file to suit your needs.
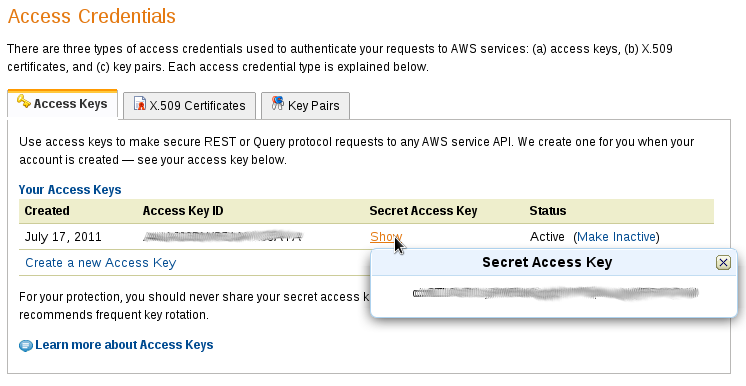
Step 3. Configure Amazon Web Services (AWS) credentials Create and export the following environment variables
$export AWS_SECRET_ACCESS_KEY=<your Amazon Web Services secret access key>

$export AWS_ACCESS_KEY_ID=<your Amazon Web Services key ID>
To find out the values, log on to your Amazon account, click on your name in the top right corner and select “Security Credentials”
Step 4. Specify Cluster Login credentials You have two options:
Option 1) use your existing SSH key pair. You will not have to specify an SSH key file explicitly each time you log on to a cluster node. Uncomment the the following settings exist in the .properties file:
# By default use the user system SSH keys. Override them here.

whirr.private-key-file=${sys:user.home}/.ssh/id_rsa

whirr.public-key-file=${whirr.private-key-file}.pub
Option 2) If you prefer, you can generate a dedicated key pair for use with the cluster.
 $ ssh-keygen -C"HBase key" -f ~/hbase-cluster/id_hbase

Generating public/private rsa key pair.

Enter passphrase (empty for no passphrase):

Enter same passphrase again:

Your identification has been saved in /home/jsmith/hbase-cluster/id_hbase.

Your public key has been saved in /home/jsmith/hbase-cluster/id_hbase.pub.

The key fingerprint is:

04:4e:6e:95:3f:3c:50:d3:b4:9d:82:ef:70:f2:68:fc HBase key
Once you have generated the key pair, update the configuration file:
# By default use the user system SSH keys. Override them here.

whirr.private-key-file=${sys:user.home}/hbase-cluster/id_rsa

whirr.public-key-file=${whirr.private-key-file}.pub
Step 5. Specify the HBase Distribution to Install As of whirr 0.7.1, the default HBase distribution to install is 0.90.0. This release is outdated and is no longer available on Apache download sites. In my case this resulted in a failure to install HBase on cluster nodes and the cluster was launched without HBase! So make sure that you specify a valid HBase download location:
# Expert: specify the version of HBase to install.

#whirr.hbase.tarball.url=https://archive.apache.org/dist/hbase/hbase-0.89.20100924/hbase-0.89.20100924-bin.tar.gz

whirr.hbase.tarball.url=https://archive.apache.org/dist/hbase/hbase-0.92.1/hbase-0.92.1.tar.gz
Step 6. Specify Cluster name and Number of Nodes Make sure the cluster name is unique. For some reason, whirr does not like cluster names being reused, so if you decide to undeploy your cluster and launch it again, make sure you change the name.
# Change the cluster name here

whirr.cluster-name=hbase-cluster1
As far as the number of nodes is concerned, you need one “master” node and at least two “worker” nodes:
# Change the number of machines in the cluster here

whirr.instance-templates=1 zookeeper+hadoop-namenode+hadoop-jobtracker+hbase-master,2 hadoop-datanode+hadoop-tasktracker+hbase-regionserver
Step 7. Launch your cluster
$WHIRR_HOME/bin/whirr launch-cluster --config ~/hbase-cluster/ec2.properties
Whirr will create the cluster VMs from pre-existing AMI images, install and configure various Hadoop and HBase components, modify the firewall rules and launch all cluster instances. You will see a number of diagnostic messages will fly by and, if everything is fine, the final messages will tell you how to log on to the cluster nodes:
You can log into instances using the following ssh commands:

'ssh -i /home/jsmith/.ssh/id_rsa -o "UserKnownHostsFile /dev/null" -o StrictHostKeyChecking=no [email protected]'

'ssh -i /home/jsmith/.ssh/id_rsa -o "UserKnownHostsFile /dev/null" -o StrictHostKeyChecking=no [email protected]'

'ssh -i /home/jsmith/.ssh/id_rsa -o "UserKnownHostsFile /dev/null" -o StrictHostKeyChecking=no [email protected]'
As it launched the cluster, whirr will create a directory under ~/.whirr/<cluster_name>. The instances file lists all cluster nodes with their respective roles.
Step 8. Test the Installation We can use HBase’s built-in performance tests to verify the installation. Log on to the master node and issue the following command:
$/usr/local/hbase-0.92.1/bin/hbase org.apache.hadoop.hbase.PerformanceEvaluation randomRead <number_of_Nodes>
This will run a random read performance test on the specified number of nodes.
Shutting Down the Cluster
When your work with the cluster is done and you no longer need it, issue the following command:
$whirr destroy-cluster --config ./hbase-ec2.properties
If you see any error messages, it is a good idea to log on to your EC2 and make sure all cluster nodes have stopped successfully – those hourly charges add up pretty quickly!
References:
- Whirr Website: https://whirr.apache.org/
- Whirr in 5 Minutes: https://whirr.apache.org/docs/0.7.1/whirr-in-5-minutes.html
- Hadoop Wiki – HBase Performance Evaluation: https://wiki.apache.org/hadoop/Hbase/PerformanceEvaluation
- HBase Project: https://hbase.apache.org/
Post Tagged with